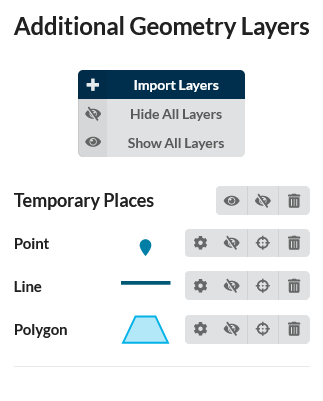
Additional Geometry Layers
LINKPlanner supports importing and visualizing GIS layers and image overlays on the map from KMZ/KML files. Each layer type (polygon, line, point and overlay) can be styled and displayed individually.

Additional Geometry Layers on the Map
Importing Geometry Layers
Click
 on the right hand side menu.
The Additional Geometry Layers mode window opens. Click
 .
.A Import geometry from KML/KMZ dialog window opens. Click
 to browse and select the file and then click OK button.
Once the import has finished, the menu in the Additional Gemetry Layers will be populated with an entry for each imported file. This menu contains a list of geometry files that have been previously imported. Use the radio button ![]() to display the desired geometry layer or select
to display the desired geometry layer or select ![]() to hide the geometry layer.
to hide the geometry layer.
Click ![]() to locate the geometry layer in the map. This command causes the layer to be visible.
to locate the geometry layer in the map. This command causes the layer to be visible.
Clcik ![]() to delete the geometry layer.
to delete the geometry layer.
Importing Geometry Layers
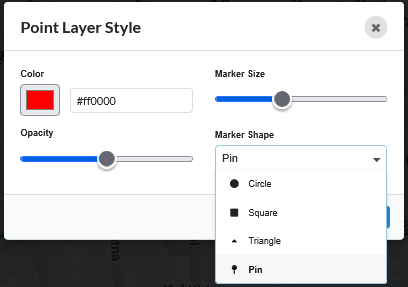
Customize Geometry Layers
Individual layer types within the imported file can be styled for better visualization.
To set the layer style, click the ![]() icon. The Style Edit window will open.
icon. The Style Edit window will open.
For the Point layer, color, marker size, opacity, and marker shape can be customized. For the Line layer, color, line thickness, opacity, and line style can be customized. For the Polygon layer, color and opacity can be customized.
Styling Geometry Layers